Table of Contents Show
How to Use a Buzzer with Arduino: A Step-by-Step Guide
Step-by-Step Process
Connect Buzzer to Arduino
Attach the buzzer's positive leg to a PWM pin and negative to GND.
Upload Basic Code
Use the `tone()` function to generate a simple sound frequency.
Set Frequency and Duration
Define the tone frequency (e.g., 1000Hz) and duration (e.g., 1000ms).
Test the Buzzer
Upload the sketch and verify the buzzer produces the expected sound.
Expand Functionality
Add buttons or sensors to trigger the buzzer dynamically.
Process infographic for How to Use a Buzzer with Arduino
Adding sound to your Arduino projects can transform simple circuits into interactive creations. Whether you’re building an alarm system, a musical instrument, or an IoT device that signals status changes, a buzzer is an essential component. This guide will walk you through everything you need to know to wire, code, and troubleshoot a buzzer with Arduino, from basic beeps to complex melodies. Let’s dive in and bring your ideas to life with sound.
Understanding the Buzzer and Arduino Components
Active vs. Passive Buzzer: Key Differences
A buzzer is an electronic device that converts electrical signals into sound. Active buzzers have an internal oscillator and produce a fixed tone when powered, requiring only a DC voltage. Passive buzzers, on the other hand, lack an internal oscillator and need an external square wave signal (like Arduino’s PWM output) to generate sound. Active buzzers are ideal for simple alerts like beeps, while passive buzzers are better suited for custom tones and melodies.
Arduino Uno: The Heart of the Project
The Arduino Uno is a versatile microcontroller board with 14 digital pins and 6 PWM pins. For active buzzers, a standard digital pin (e.g., D8) controls the signal, while passive buzzers require a PWM pin (e.g., D9) to vary frequencies. Always check the Uno’s datasheet for pin specifications and ensure you’re using the correct power (5V) and ground (GND) connections.
Additional Components Needed
To connect a buzzer, you’ll need:
- Buzzer (active or passive)
The resistor protects the buzzer from overcurrent, while the breadboard allows for easy prototyping without permanent soldering.
Setting Up the Buzzer with Arduino
Preparing Your Workspace
Gather your tools: a multimeter to verify connections, a soldering iron (for permanent setups), and the Arduino IDE for coding. A tidy workspace and double-checked component ratings will prevent errors and hardware damage.
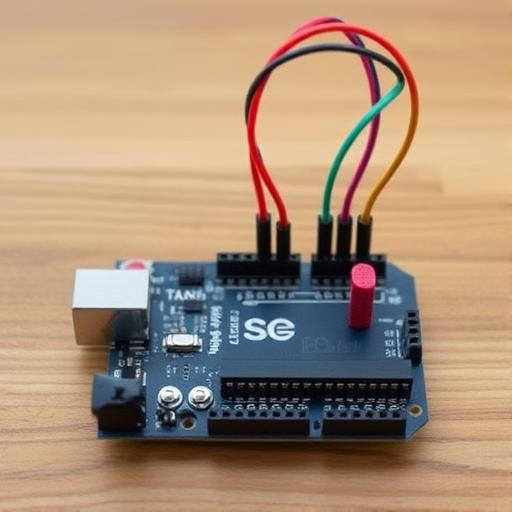
Wiring the Buzzer to Arduino
Connecting an Active Buzzer
Follow these steps:
- Link the positive (+) buzzer pin to the Arduino’s 5V.
No resistor is needed for active buzzers since they operate on fixed voltage.
Connecting a Passive Buzzer
For passive buzzers:
- Connect the positive terminal to a PWM pin (e.g., D9).
This setup allows precise control over tone frequency and duration.
Verifying the Circuit
Use a multimeter to confirm voltage levels and continuity. Ensure correct polarity (positive to power, negative to ground) and avoid short circuits by inspecting wire connections. A quick test with a battery can verify the buzzer works before uploading code.
Writing the Arduino Code
Basic Buzzer Code Structure
For active buzzers, use pinMode() and digitalWrite(). For passive buzzers, leverage the tone() function to generate sound. Here’s a simple example:

int buzzerPin = 8;
void setup() {
  pinMode(buzzerPin, OUTPUT);
}
void loop() {
  digitalWrite(buzzerPin, HIGH);  // Active buzzer on
  delay(1000);
  digitalWrite(buzzerPin, LOW);   // Active buzzer off
  delay(1000);
}
Passive buzzers require specifying frequency and duration:
tone(buzzerPin, 1000);  // 1kHz tone for 1 second
delay(1000);
noTone(buzzerPin);
Creating Simple Sounds
Use delays and loops to craft patterns. For instance, a door alarm might alternate beeps with varying intervals. Always include noTone() or set LOW to stop sound when needed.
Generating Custom Sound Effects
Store note frequencies in arrays to play melodies. The Tone.h library can handle complex sequences. Example code for “Twinkle Twinkle Little Star”:
int melody[] = {262, 262, 330, 330, 392, 392, 392};
int durations[] = {4, 4, 4, 4, 4, 4, 4};
void loop() {
  for (int i = 0; i < 7; i++) {
    tone(buzzerPin, melody[i], 500);
    delay(500 * durations[i]);
  }
}
Advanced Buzzer Applications
Controlling Sound with Sensors
Pairs a buzzer with a PIR sensor for motion-triggered alarms. Use a potentiometer to adjust the pitch of a passive buzzer. Here’s a code snippet for a PIR-triggered beep:
int pirPin = 2;
void loop() {
  if (digitalRead(pirPin) == HIGH) {
    tone(buzzerPin, 500, 1000);  // Beep on motion detection
  } else {
    noTone(buzzerPin);
  }
}
Building a Music Player
Map musical notes to frequencies and sequence them using tone(). For richer audio, add an SD card module to play MP3 files. Libraries like DFMiniMp3 simplify this process.
Debugging Code and Hardware Integration
Isolate problems by testing code on a standalone buzzer. Use the Arduino’s serial monitor to log sensor values and confirm inputs. A stable PWM signal is crucial for consistent passive buzzer performance.
Common Issues and Troubleshooting Tips
No Sound from the Buzzer
Common causes include reversed polarity, loose connections, or a defective component. Swap the buzzer wires to test for polarity issues or replace the buzzer with a new one.
Incorrect or Unwanted Tones
Verify frequency values in your code and avoid overlapping signals. Add a capacitor (0.1µF) to the buzzer circuit to reduce noise and stabilize the voltage.
Hardware Damage from Overcurrent
Exceeding the buzzer’s current limits can damage the Arduino. Use a transistor or relay for high-power applications to offload current draw from the board.
Conclusion: Bringing It All Together
By following this guide, you’ve learned to integrate and program a buzzer with Arduino. From basic alarms to musical compositions, the possibilities are endless. Experiment with sensors, custom melodies, and external libraries to expand your creativity. Share your buzzer-based projects in the comments below to inspire the community!
FAQ: How to Use a Buzzer with Arduino
Can I use an active buzzer for playing melodies?
No. Active buzzers emit a fixed tone and cannot produce varying frequencies. For melodies, use a passive buzzer with the tone() function.
What resistor value should I use with a passive buzzer?
A resistor between 220–470 ohms is recommended to limit current and prevent overloading the Arduino’s pin. Always check the buzzer’s datasheet for specifics.
How do I reverse the polarity of a buzzer?
Some buzzers are polarized. Disconnect the wires and swap the positive and negative terminals. If the buzzer remains silent, it likely requires correct polarity for operation.
Can I control the buzzer volume with Arduino?
Yes. Use a PWM pin to adjust the duty cycle (via analogWrite()) or integrate an amplifier circuit with a transistor to modulate volume effectively.
How to generate a specific frequency using the tone() function?
Use the syntax tone(pin, frequency, duration). For example, tone(9, 440, 500); produces a 440Hz note (A4) for 500 milliseconds on pin D9.


