Table of Contents Show
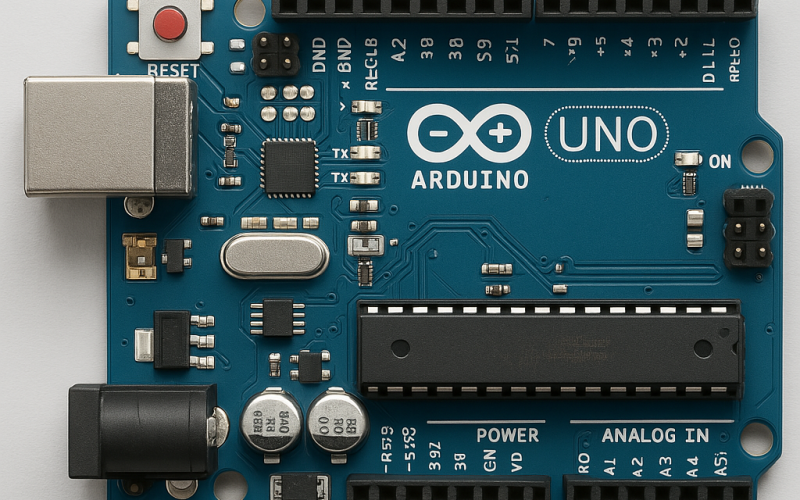
Arduino UNO is one of the most popular microcontroller boards in the world of electronics and DIY projects. Its simplicity, versatility, and affordability make it an ideal choice for beginners and hobbyists alike. Whether you’re looking to create a simple LED blink project or a more complex home automation system, Arduino UNO is the perfect starting point. This guide will walk you through the essentials of using Arduino UNO, from setting it up to writing your first program, so you can confidently dive into your next electronics adventure.
Step-by-Step Process
Install Arduino IDE
Download and install the Arduino IDE from the official website.
Connect Arduino Uno
Attach the Uno to your computer via USB cable.
Select Board & Port
In IDE, choose Arduino Uno and the correct COM port.
Upload Basic Sketch
Load a simple example (e.g., Blink) and upload to the board.
Verify Functionality
Check if the LED blinks to confirm successful setup.
Process infographic for How to Use Arduino Uno
Getting Started with Arduino UNO
Before you begin working with Arduino UNO, it’s important to gather the necessary tools and understand its components. Here’s what you’ll need to get started:

- Arduino UNO board
- USB cable (Type A to B)
- Computer with Arduino IDE installed
- LEDs, resistors, and other basic components for projects
Once you have everything ready, familiarize yourself with the Arduino UNO board. Key components include the microcontroller (ATmega328P), digital and analog pins, power jack, and USB connection. Understanding these parts will help you make the most of your projects.
Installing the Arduino IDE
The Arduino Integrated Development Environment (IDE) is the software used to write and upload code to the Arduino board. Follow these steps to install it:
- Visit the official Arduino website (arduino.cc) and download the IDE for your operating system.
- Install the software by following the on-screen instructions.
- Connect your Arduino UNO to your computer using the USB cable.
- Open the Arduino IDE and select the correct board and port under the Tools menu.
Writing Your First Program
Now that everything is set up, it’s time to write your first program. The classic “Blink” example is a great way to start. Here’s how:

- Open the Arduino IDE and go to File > Examples > 01.Basics > Blink.
- This code will make the built-in LED on the Arduino UNO blink on and off.
- Click the “Upload” button (right arrow icon) to transfer the code to the board.
- If successful, you’ll see the LED blinking at a steady interval.
Exploring Advanced Features
Once you’re comfortable with the basics, you can explore more advanced features of Arduino UNO. Here are a few ideas to get you started:
Using Digital and Analog Pins
Arduino UNO has 14 digital pins (for on/off signals) and 6 analog pins (for reading varying voltages). You can use these pins to connect sensors, LEDs, motors, and other components. For example, you can use a potentiometer with an analog pin to control the brightness of an LED.

Working with Libraries
Arduino libraries are pre-written code that simplify complex tasks. For instance, the Servo library makes it easy to control servo motors. To use a library, go to Sketch > Include Library and select the desired one. This can save you time and effort in your projects.
Tips for Successful Projects
To ensure your Arduino projects run smoothly, keep these tips in mind:
- Double-check your wiring to avoid short circuits or incorrect connections.
- Test your code in small sections to identify and fix errors early.
- Use comments in your code to document your logic and make it easier to understand.
- Explore online communities and forums for inspiration and troubleshooting help.
Conclusion
Arduino UNO is a powerful tool that opens up endless possibilities for creativity and innovation in electronics. By following this guide, you’ve taken the first steps toward mastering this versatile platform. Whether you’re a beginner or an experienced hobbyist, Arduino UNO offers a rewarding experience that combines learning and fun. So, grab your board, start experimenting, and let your imagination run wild!


