Table of Contents Show
Building a Bluetooth-controlled Arduino car is a fun and rewarding project that combines electronics, programming, and robotics. Whether you’re a beginner looking to dive into the world of Arduino or a hobbyist eager to create something interactive, this project is a great way to learn. By the end of this guide, you’ll have a fully functional car that you can control using your smartphone via Bluetooth. This project is perfect for students, tinkerers, and anyone interested in exploring the possibilities of Arduino and wireless communication.
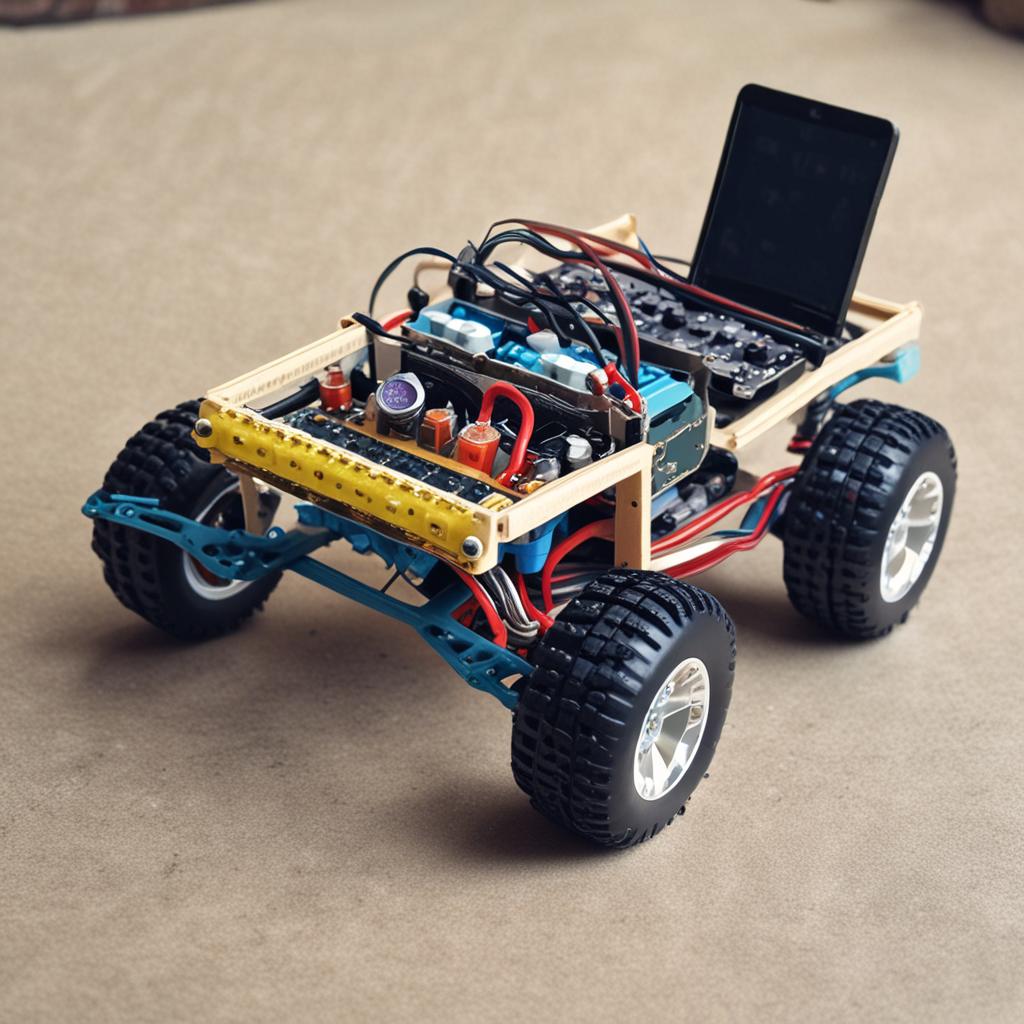
Understanding the Components
Hardware Requirements
To build your Bluetooth-controlled Arduino car, you’ll need the following hardware components:
- Arduino board: Uno, Nano, or similar (Uno is recommended for beginners).
- Motor driver: L298N or L293D to control the DC motors.
- DC motors and wheels: Two or four motors depending on your design.
- Chassis for the car: A pre-made chassis or DIY option.
- Bluetooth module: HC-05 or HC-06 for wireless communication.
- Power supply: 9V battery or LiPo battery for powering the car.
- Jumper wires and breadboard: For easy connections (optional).
Software Requirements
You’ll also need the following software tools:
- Arduino IDE: Download the latest version from the official website.
- Bluetooth terminal app: Available for Android or iOS to send commands.
- Sample code: Pre-written or custom code for motor control.
Circuit Assembly & Wiring
Connecting Motors to the Motor Driver
Start by wiring the DC motors to the motor driver. Connect the motor terminals to the output pins of the L298N or L293D. Ensure the motor driver is powered externally (e.g., using a 9V battery) for better performance. Connect the motor driver’s input pins to the Arduino’s digital output pins.
Connecting Bluetooth Module to Arduino
Next, connect the Bluetooth module to the Arduino. Link the TX and RX pins of the HC-05/HC-06 to the Arduino’s RX and TX pins, respectively. Power the Bluetooth module using the Arduino’s 3.3V or 5V pin, depending on the module’s requirements. Avoid ground loops by ensuring all components share a common ground.
Power Supply Setup
Choose a suitable power source for your car. A 9V battery is simple but may not last long. A LiPo battery offers better performance but requires a voltage regulator. Ensure the voltage matches the motor driver and Arduino’s requirements.

Programming the Arduino
Basic Motor Control Code
Write or upload a basic motor control code to the Arduino. Use digitalWrite() to control the motor driver’s input pins, enabling forward, backward, left, and right movements. Test each direction to ensure the motors respond correctly.
Bluetooth Communication Code
Add Bluetooth functionality by reading serial commands from the Bluetooth module. Parse the commands (e.g., ‘F’ for forward, ‘B’ for backward) and use them to control the motors. Ensure the baud rate in the code matches the Bluetooth module’s default rate.
Testing & Debugging
Test the car to ensure it responds to Bluetooth commands. If issues arise, use the Serial Monitor to debug the code. Common problems include incorrect wiring, mismatched baud rates, or insufficient power supply.
Building the Chassis & Final Assembly
Assembling the Car Body
Secure all components onto the chassis. Ensure the motors and wheels are aligned for smooth movement. Use screws, glue, or zip ties to keep everything in place.
Powering Up & Initial Test
Double-check all connections before powering up the car. Test the motor movements via the Bluetooth terminal app. Adjust the code or connections if necessary.
Enhancements & Modifications
Once the basic car is functional, consider adding enhancements like an obstacle avoidance sensor or a robotic arm. You can also customize the Bluetooth control app for a more personalized experience.

Conclusion
Building a Bluetooth-controlled Arduino car is an exciting project that teaches valuable skills in electronics and programming. By following this guide, you’ve learned how to assemble the hardware, write the code, and troubleshoot common issues. Don’t stop here—experiment with upgrades like Wi-Fi control or AI integration to take your project to the next level. Happy tinkering!
FAQ: Bluetooth-Controlled Arduino Car
Which Arduino board is best for a Bluetooth car?
Arduino Uno or Nano are great for beginners due to simplicity and compatibility.

Can I use any Bluetooth module?
HC-05 and HC-06 are the most common, but others like JY-MCU can also work.
How do I increase the car’s range?
Use a stronger Bluetooth module or add an external antenna for better signal strength.
Why won’t my Arduino receive Bluetooth commands?
Check wiring (TX/RX connections), enable Bluetooth pairing, and verify baud rates in code.
Can I control multiple motors independently?
Yes, by using a motor driver with multiple channels or PWM control for speed adjustment.


