
Table of Contents Show
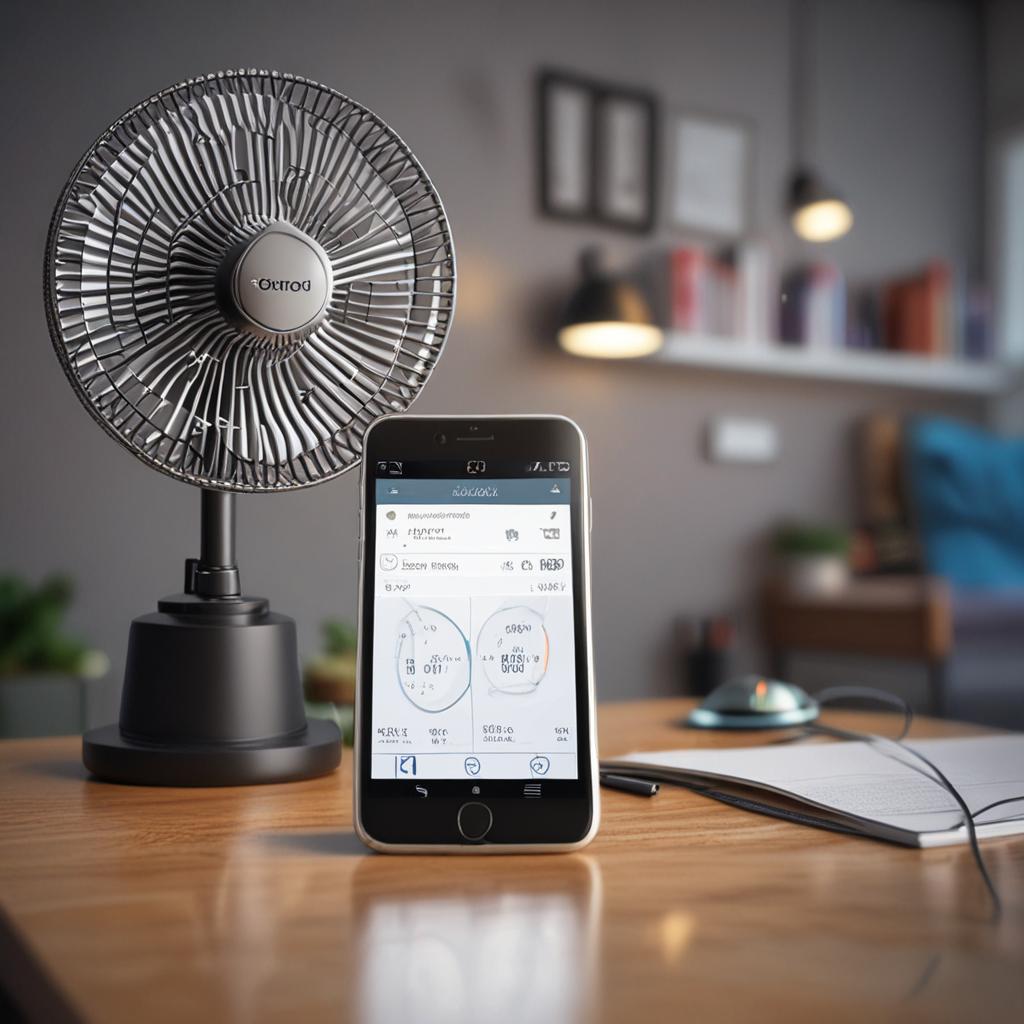
Imagine adjusting your ceiling fan’s speed from the comfort of your bed or turning it off remotely when you realize you left it running before heading to work. With the rise of smart homes and IoT technology, this isn’t science fiction—it’s something you can build yourself today. By combining a low-cost NodeMCU development board with simple electronics and a mobile app, you can transform a regular ceiling fan into a smart, remotely controllable device. This guide walks you through creating a system that lets you control fan speed via your smartphone using IoT, offering convenience, energy savings, and a glimpse into the future of home automation—all without breaking the bank.
Why Control Fan Speed Remotely?
Remote fan control is more than just a luxury—it’s a practical upgrade to everyday living. Being able to adjust your fan without getting up enhances comfort, especially during sleep or when relaxing. It’s particularly helpful for elderly individuals or those with limited mobility who may find it difficult to reach wall controls or pull cords.
From an energy efficiency standpoint, remote control prevents fans from running at high speeds unnecessarily. You can dim the fan when the room is cool or turn it off entirely with a tap on your phone. This reduces electricity consumption and extends the life of the motor.
Moreover, integrating fan control into a smart home ecosystem opens doors to automation. You can schedule the fan to turn on before you get home, link it to room temperature readings, or control it using voice commands. The ability to monitor and manage your appliances remotely makes your home not just smarter, but more responsive to your lifestyle.
Understanding the Core Technologies
At the heart of this project are three key technologies: IoT, NodeMCU, and mobile applications. Together, they form a seamless bridge between physical hardware and digital control, enabling real-time interaction with household appliances from anywhere in the world.
What is IoT (Internet of Things)?
The Internet of Things (IoT) refers to a network of physical devices embedded with sensors, software, and connectivity that allows them to exchange data over the internet. In smart homes, IoT enables everyday objects—like lights, thermostats, and fans—to be monitored and controlled remotely. By connecting your fan to the internet, you turn it into an intelligent device that responds to your commands in real time.
Introduction to NodeMCU (ESP8266)
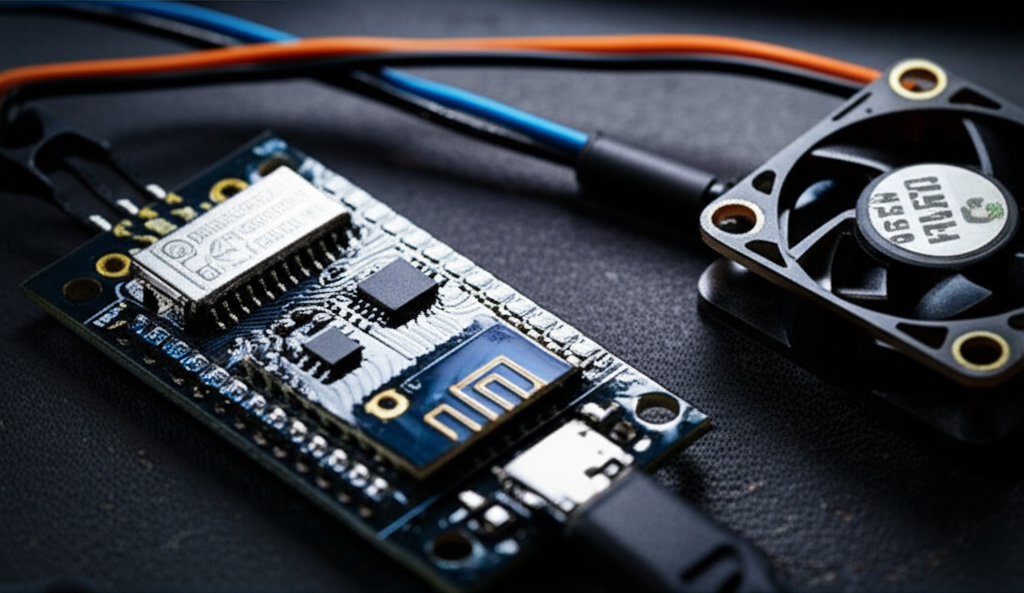
NodeMCU is an open-source IoT platform built around the ESP8266 Wi-Fi module. It’s a compact, affordable microcontroller that supports Wi-Fi connectivity and can be programmed using the Arduino IDE. In this project, NodeMCU acts as the central brain, receiving commands from your mobile app and adjusting the fan speed accordingly. Its GPIO pins interface with the fan control circuit, and its built-in Wi-Fi allows seamless communication with your home network.
Role of Mobile Applications in IoT
Mobile apps serve as the user interface for IoT devices. Instead of physical switches, you interact with your fan through a smartphone application. The app sends commands over Wi-Fi to the NodeMCU, which then adjusts the fan. Platforms like Blynk or MIT App Inventor make it easy to create intuitive interfaces—such as sliders or buttons—without needing extensive app development experience. This human-friendly control layer makes smart home systems accessible and easy to use.
Components Required for the Project
To bring this project to life, you’ll need both hardware and software components. Most of these are readily available and affordable, making the system accessible to hobbyists and beginners alike.
Hardware Components
- NodeMCU (ESP8266): The main controller that handles Wi-Fi communication and fan control logic.
Software and Development Tools
- Arduino IDE: Used to write and upload code to the NodeMCU.
How the System Works: Architecture Overview
The system operates through a clear sequence of actions. When you adjust the fan speed using a slider in your mobile app, the command is sent over your Wi-Fi network to the NodeMCU. The NodeMCU receives the instruction and processes it to determine the appropriate fan speed level.
Instead of using standard PWM (which doesn’t work directly with AC), the NodeMCU controls the fan by adjusting the firing angle of the TRIAC. This method, known as phase control, cuts portions of the AC waveform to reduce the effective voltage delivered to the fan. The timing is synchronized using a zero-crossing detection circuit to ensure precise control.
The optocoupler triggers the TRIAC based on signals from the NodeMCU, effectively regulating the power to the fan motor. This allows for smooth, stepless speed variation—all managed remotely through your smartphone.
Step-by-Step Implementation Guide
Building this system involves hardware setup, coding, and app configuration. Follow these steps to get your smart fan up and running.
Progress Overview
Progress analysis for Control Fan Speed via Mobile Using Iot and Nodemcu
Circuit Design and Connections
Connect the NodeMCU GPIO pin (e.g., D5) to the input of the MOC3021 optocoupler. The output of the optocoupler drives the gate of the TRIAC (BT136), which is connected in series with the fan and AC mains. Include a zero-crossing detection circuit using a resistor network and optocoupler (like MOC3041) to ensure accurate timing.
Always assemble the circuit with the power disconnected. Use an insulated enclosure for AC components and consider using a pre-built AC dimmer module for safer integration. Double-check all connections before applying power.
Programming the NodeMCU
Using Arduino IDE, write a sketch that connects the NodeMCU to your Wi-Fi network and initializes the Blynk library. Use virtual pins in Blynk to receive speed commands from the app. Based on the received value (e.g., 0 to 1023), adjust the delay after zero-crossing to control the TRIAC firing angle.
For example, higher values result in earlier triggering and higher fan speed. Implement delays using timer interrupts to avoid blocking the main loop. Include logic for multiple speed levels (e.g., Low, Medium, High) or smooth slider control.
Developing the Mobile App Interface
In the Blynk app, create a new project for NodeMCU and add a slider widget linked to a virtual pin (e.g., V1). Set the range from 0 to 1023 to match PWM-like values. When you move the slider, Blynk sends the value to the NodeMCU in real time.
Alternatively, use MIT App Inventor to build a custom Android app that sends HTTP GET requests to the NodeMCU’s local IP address with speed parameters. For advanced users, MQTT can be used for reliable messaging, especially in larger smart home setups.
Testing and Calibration
Start with low power settings and gradually increase the speed while observing the fan response. Ensure the zero-crossing detection is functioning correctly—erratic behavior often stems from timing issues. Use a serial monitor to debug Wi-Fi connection status and command reception.
Verify that the fan operates smoothly across all speed levels and doesn’t produce unusual noise or overheating. If the fan doesn’t respond, double-check TRIAC connections, NodeMCU power supply, and app authentication tokens.
Safety Considerations and Best Practices
Working with AC mains power carries inherent risks, so safety must be the top priority throughout this project.
Electrical Safety Tips
Always disconnect power before making or modifying connections. Use insulated tools and wear rubber-soled shoes when testing live circuits. Never touch exposed AC terminals, and enclose all high-voltage components in a non-conductive box.
To minimize risk, consider using a commercially available AC dimmer module with built-in isolation and protection. These modules are tested and certified, offering a safer alternative to hand-built TRIAC circuits.
Secure Communication
Use a password-protected Wi-Fi network to prevent unauthorized access to your IoT device. In Blynk, ensure your authentication token is kept private and not shared in public code repositories.
Avoid exposing your NodeMCU to the public internet unless using secure protocols like HTTPS or MQTT with TLS. For local-only control, configure the NodeMCU as a web server within your home network to eliminate cloud dependency.
Advanced Features and Enhancements
Once the basic system is working, you can add intelligent features to enhance functionality and convenience.
Integrate Temperature Sensor (e.g., DHT11/DHT22)
Connect a DHT11 or DHT22 sensor to the NodeMCU to monitor room temperature. Program the system to automatically increase fan speed when the temperature rises above a threshold, creating a self-regulating cooling system.
Voice Control with Alexa or Google Assistant
Link your Blynk project with IFTTT (If This Then That) to enable voice commands. Say “Hey Google, turn on the bedroom fan” and have it adjust based on preset levels. This integration brings hands-free control to your smart home setup.
Scheduling and Automation
Use Blynk’s timer widgets or program the NodeMCU to follow a schedule. For example, turn the fan on at 7 PM daily or reduce speed after midnight for quieter operation during sleep.
Monitoring Energy Consumption
Add an ACS712 current sensor to measure the fan’s power draw. With this data, you can estimate energy usage over time and identify opportunities for further savings—turning your smart fan into an energy-efficient appliance.
Troubleshooting Common Issues
Even well-designed projects can encounter hiccups. Here’s how to resolve some common problems.
NodeMCU Not Connecting to Wi-Fi
Verify that the SSID and password in your code are correct. Ensure the NodeMCU is receiving stable 5V power—unstable voltage can cause connection drops. Check if your router uses a compatible security protocol (WPA2 is recommended).
Fan Not Responding to Commands
Confirm that the TRIAC and optocoupler are properly connected and functional. Test the zero-crossing signal using an oscilloscope or logic analyzer. If using a slider, ensure the app is sending values within the expected range.
App Not Communicating with Device
Recheck the Blynk authentication token in your code. Ensure both the phone and NodeMCU are on the same Wi-Fi network. If using a local server, confirm the IP address and port settings are correct.
Conclusion
Controlling a ceiling fan’s speed via mobile using IoT and NodeMCU is a powerful step toward a smarter, more efficient home. This project combines affordability, practicality, and innovation, allowing you to manage comfort and energy use with just a few taps on your smartphone. With basic electronics knowledge and simple coding, anyone can build this system and customize it to their needs.
Beyond convenience, this solution promotes energy conservation and accessibility, making it a valuable addition to modern living spaces. As you explore further integrations—like temperature sensing, voice control, or automation—you’ll unlock even greater potential from your smart home ecosystem. The future of home automation isn’t just for tech companies; it’s in your hands, one NodeMCU at a time.
Frequently Asked Questions (FAQ)
Can I control multiple fans with one NodeMCU?
Yes, you can control multiple fans by using additional TRIAC circuits connected to different GPIO pins on the NodeMCU. Alternatively, use Wi-Fi relay modules for each fan and manage them all through a single app interface.
Is it safe to build this project at home?
Yes, with proper precautions. Always work with power disconnected, use insulated tools, and consider using pre-built AC dimmer modules instead of constructing high-voltage circuits from scratch to minimize risk.
Do I need internet to control the fan?
It depends on the setup. Cloud-based apps like Blynk require internet, but you can configure the NodeMCU as a local web server to allow control over your home Wi-Fi network without external internet access.
Can I use Alexa or Google Assistant with this setup?
Absolutely. By linking your Blynk app with IFTTT or using MQTT with platforms like Home Assistant, you can enable voice control via Alexa or Google Assistant for a seamless smart home experience.
How much does it cost to build this system?
The total cost typically ranges from $15 to $30, depending on whether you use individual components or pre-assembled modules. NodeMCU and basic electronic parts are inexpensive, making this a budget-friendly smart home upgrade.


