Table of Contents Show
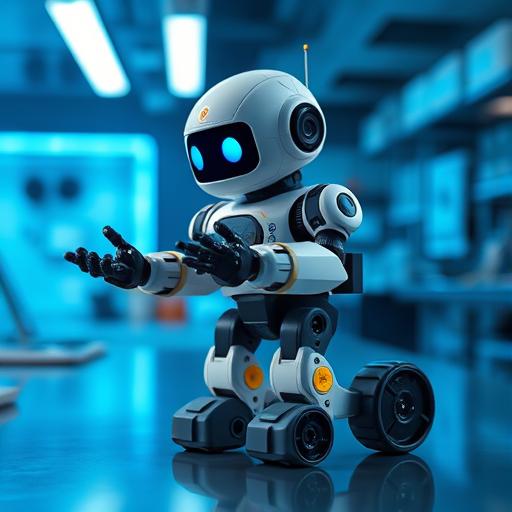
Imagine controlling a robot with just a wave of your hand or a tilt of your wrist. Gesture-controlled robots make this possible by translating human movements into precise robotic actions. At the heart of this technology lies the MPU6050 sensor—a compact yet powerful device combining an accelerometer and gyroscope—and the versatile Arduino platform. Together, they enable robots to respond to gestures, opening doors to innovative applications in automation, assistive technology, and beyond. In this guide, we’ll walk you through building your own gesture-controlled robot, from understanding the components to coding and testing the system.

Understanding the Components
What is an MPU6050?
The MPU6050 is a 6-axis motion tracking sensor that combines a 3-axis accelerometer and a 3-axis gyroscope in a single chip. This makes it ideal for detecting tilts, shakes, and rotations—essential for gesture recognition. By measuring acceleration and angular velocity, the MPU6050 provides real-time data that Arduino can interpret to control the robot’s movements.

Introduction to Arduino
Arduino is an open-source microcontroller platform widely used in robotics and DIY electronics. Its simplicity, extensive community support, and compatibility with various sensors make it perfect for projects like gesture-controlled robots. Arduino boards, such as the Uno or Nano, can read sensor data, process it, and send commands to motors, forming the brain of the robot.
Other Essential Components
To build a gesture-controlled robot, you’ll need:
-
- Motors: DC or servo motors for movement.
- Motor Driver: A module (e.g., L298N) to control motor speed and direction.
- Chassis: A frame to mount the components.
- Power Supply: A 9V battery or similar source to power the Arduino and motors.
- Jumper Wires: For connecting components.
How Does Gesture Control Work?
Basics of Gesture Recognition
The MPU6050 captures data on the robot’s orientation and movement. For example, tilting the sensor forward might trigger the robot to move forward. The accelerometer detects linear motion, while the gyroscope measures rotational movement. By analyzing these signals, Arduino can translate gestures into specific commands—like steering left or right.
Data Processing with Arduino
Arduino reads the raw sensor data, applies filters (e.g., Kalman filter) to reduce noise, and maps the values to motor actions. For instance, a sharp tilt could correspond to a higher motor speed. The code acts as the bridge between the user’s gestures and the robot’s response, ensuring smooth and accurate control.
Building the Gesture-Controlled Robot
Step 1: Assembling the Hardware
Start by attaching the motors to the chassis and connecting them to the motor driver. Ensure the driver is powered separately from the Arduino to avoid voltage drops. Secure the Arduino and MPU6050 on the chassis, leaving space for wires and adjustments.
Step 2: Connecting the MPU6050 to Arduino
Wire the MPU6050 to the Arduino using I2C communication:
- Connect VCC to 5V on Arduino.
- Connect GND to GND.
- Connect SCL to A5 and SDA to A4 (for Arduino Uno).
Double-check connections to avoid shorts or miswiring.
Step 3: Uploading the Code
The Arduino code consists of:
- Library Inclusion: Use the MPU6050 library (e.g., “Wire.h” and “MPU6050.h”).
- Initialization: Set up the sensor and motor driver.
- Gesture Logic: Define thresholds for gestures (e.g., tilt angles) and corresponding motor actions.
Upload the code via the Arduino IDE, ensuring no errors occur.
Step 4: Testing and Calibration
Power on the robot and test gestures in a controlled environment. Calibrate the MPU6050 by placing it flat and noting the neutral readings. Adjust the code thresholds to fine-tune gesture sensitivity. Repeat tests until the robot responds reliably.
Applications of Gesture-Controlled Robots
Gesture-controlled robots have diverse applications:
- Assistive Devices: Help individuals with mobility challenges operate robots hands-free.
- Industrial Automation: Control machinery in hazardous environments without physical contact.
- Educational Tools: Teach students about robotics, sensors, and programming.
Challenges and Solutions
Common Issues in Gesture Control
Challenges include:
- Inaccurate Gestures: Sensor noise or calibration errors may cause erratic movements.
- Interference: Magnetic fields or vibrations can disrupt readings.
Tips for Improving Accuracy
To enhance performance:
- Calibrate Thoroughly: Account for sensor bias and environmental factors.
- Use Filters: Apply low-pass or Kalman filters to smooth data.
- Optimize Code: Refine gesture thresholds and response times.
Future of Gesture-Controlled Robotics
The future holds exciting advancements:
- AI Integration: Machine learning could enable robots to recognize complex gestures.
- Advanced Sensors: Higher-precision sensors may improve reliability.
- Wireless Control: Bluetooth or Wi-Fi could expand gesture range.
Conclusion
Building a gesture-controlled robot with MPU6050 and Arduino is a rewarding project that combines hardware and software skills. From detecting simple tilts to enabling hands-free control, this technology has vast potential in robotics. Whether for education, automation, or accessibility, gesture control is shaping the future of human-machine interaction. Ready to get started? Grab your components and bring your robot to life!
FAQ Section
What is the MPU6050 sensor used for in this project?
The MPU6050 detects motion and orientation, enabling the robot to recognize gestures like tilts or shakes.

Can I use a different microcontroller instead of Arduino?
Yes, but Arduino’s simplicity and extensive libraries make it ideal for beginners and hobbyists.
How accurate is gesture recognition with the MPU6050?
Accuracy depends on calibration and filtering; it works well for basic gestures but may need enhancements for complex tasks.
What are the power requirements for this robot?
A 9V battery or similar power source is typically sufficient for the Arduino and motors.
Can this project be scaled for industrial applications?
Yes, with upgrades like robust sensors, better algorithms, or wireless modules, it can be adapted for industrial use.


