Table of Contents Show
Measuring humidity is crucial in various applications, from ensuring optimal conditions in greenhouses to maintaining comfortable and safe environments in homes and workplaces. With the power of Arduino and the reliable DHT22 sensor, building a precise and cost-effective humidity measurement system is now more accessible than ever. This blog post will guide you through the process of setting up your own humidity monitoring system, covering everything from understanding the DHT22 sensor to calibrating your measurements and integrating them with other devices.
Overview of Humidity Measurement
Humidity, the amount of water vapor in the air, significantly impacts various processes and environments. Accurate humidity measurement is essential in weather forecasting, agricultural practices, industrial manufacturing, and even home climate control. Arduino, a versatile microcontroller platform, combined with the DHT22 sensor, provides a simple yet effective solution for measuring and monitoring humidity levels.
This combination allows for real-time data acquisition, enabling timely adjustments and interventions in various applications. Whether it’s optimizing conditions in a greenhouse or ensuring proper ventilation in a building, Arduino and DHT22 offer a powerful tool for humidity management.
Benefits of Using Arduino and DHT22 Sensor
The Arduino and DHT22 sensor pairing offers several advantages for humidity measurement. These include their low cost, making them accessible for hobbyists and professionals alike. Their ease of use simplifies the setup and programming process, even for beginners. Furthermore, the DHT22 sensor provides relatively high accuracy, ensuring reliable and consistent measurements.
The modularity of Arduino allows for easy integration with other sensors and devices, creating a comprehensive environmental monitoring system. Its open-source nature fosters a vibrant community, providing ample resources and support for users.
Understanding the DHT22 Sensor
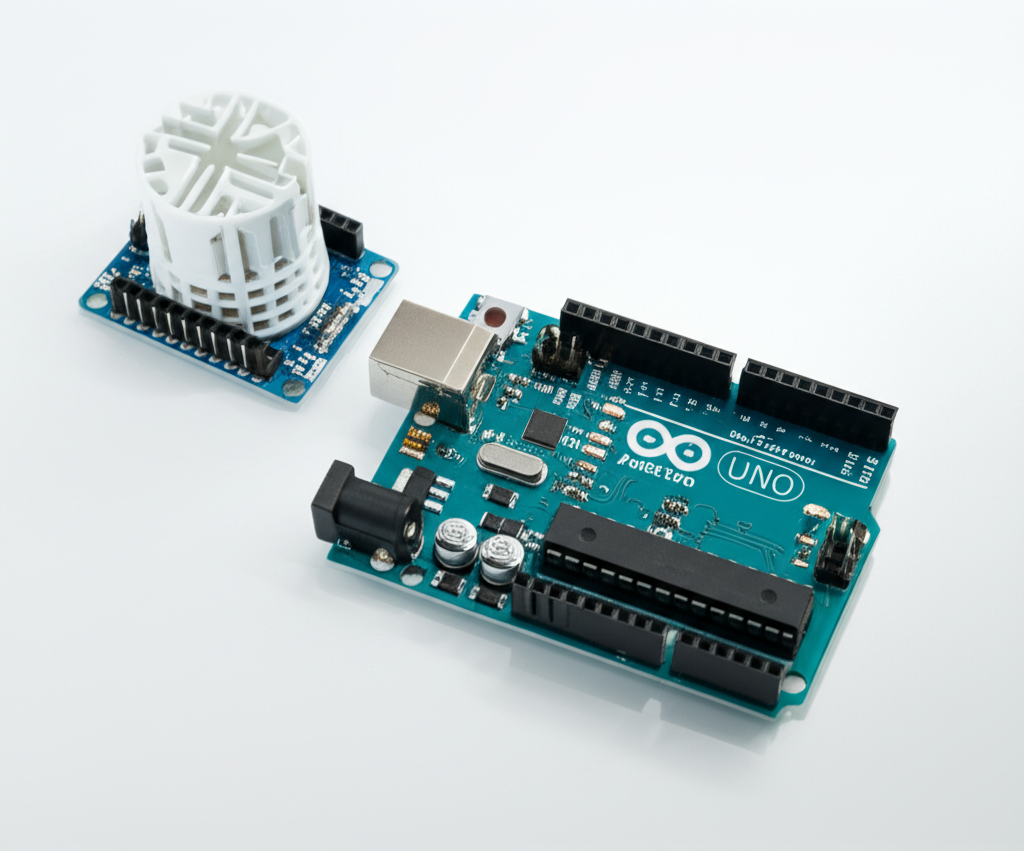
The DHT22 is a popular and cost-effective sensor used for measuring both temperature and humidity. It provides digital output, making it easy to interface with microcontrollers like Arduino. This sensor is known for its relatively high accuracy and wide measuring range compared to other similar sensors, such as the DHT11.
The DHT22 utilizes a capacitive humidity sensor and a thermistor to measure the surrounding environment. It then transmits these readings as a digital signal, simplifying data acquisition and processing.
Pinout and Connection Diagram
The DHT22 sensor typically has four pins. Pin 1 is VCC (power), which should be connected to 3.3V or 5V on the Arduino. Pin 2 is DATA, which transmits the humidity and temperature readings to the Arduino. Pin 3 is NC (not connected) and is not used. Pin 4 is GND (ground), which should be connected to the ground pin on the Arduino.
A connection diagram typically involves connecting the DHT22 DATA pin to a digital pin on the Arduino (e.g., digital pin 2). A pull-up resistor (typically 10k ohms) is often placed between the DATA pin and VCC to ensure stable communication. Always double-check the datasheet for the specific pinout and voltage requirements.
Setting Up the Arduino Environment
Installing the DHT Library
To effectively communicate with the DHT22 sensor, you need to install the DHT library in the Arduino IDE. This library provides the necessary functions for reading data from the sensor. To install it, open the Arduino IDE, go to Sketch > Include Library > Manage Libraries.
In the Library Manager, search for “DHT sensor library” by Adafruit. Install the library, along with the Adafruit Unified Sensor library if prompted. Once installed, you can include the library in your Arduino sketch using the `#include ` directive.
Key Metrics
Performance metrics for How to Measure Humidity with Arduino and Dht22 Sensor
Writing the Code for Humidity Measurement
Here’s a sample code snippet to measure humidity and temperature using the DHT22 sensor with Arduino:
include "DHT.h"define DHTPIN 2 // Digital pin connected to the DHT sensor define DHTTYPE DHT22 // DHT 22 (AM2302), AM2320
DHT dht(DHTPIN, DHTTYPE);

void setup() { Serial.begin(9600); dht.begin(); }
void loop() { delay(2000);
float h = dht.readHumidity(); float t = dht.readTemperature();
if (isnan(h) || isnan(t)) { Serial.println(“Failed to read from DHT sensor!”); return; }
Serial.print("Humidity: ");
  Serial.print(h);
  Serial.print(" %t");
  Serial.print("Temperature: ");
  Serial.print(t);
  Serial.println(" *C ");
}
This code initializes the DHT library, reads the humidity and temperature values from the sensor, and prints them to the Serial Monitor. The `dht.readHumidity()` and `dht.readTemperature()` functions are used to retrieve the sensor readings. Error handling is included to check for invalid readings.
Calibrating and Testing the Humidity Measurement System
Calibrating the DHT22 Sensor
While the DHT22 sensor offers reasonable accuracy, calibration can further improve its reliability. Calibration involves comparing the sensor’s readings against a known standard and adjusting the code to compensate for any discrepancies. A simple method involves using a calibrated hygrometer as a reference.
Place the DHT22 sensor alongside the calibrated hygrometer in a stable environment. Record the readings from both devices over a period of time. Calculate the average difference between the DHT22 readings and the reference hygrometer readings. Incorporate this offset into your Arduino code to adjust the sensor’s output.
Testing the Humidity Measurement System
After setting up the system, it’s important to test its functionality. Verify the sensor readings by comparing them with a calibrated hygrometer or weather station. Check for any errors or inconsistencies in the data. Monitor the sensor’s performance over time to ensure its reliability.
Test the system under different humidity conditions to assess its accuracy across the entire measuring range. Log the data to identify any drift or inconsistencies in the readings. Address any issues promptly to maintain the system’s accuracy and reliability.
Interfacing the Humidity Measurement System with Other Devices
Displaying Humidity Readings on an LCD Display
To display the humidity readings on an LCD display, you’ll need to connect the LCD to the Arduino. Use the LiquidCrystal library to control the LCD. Connect the LCD’s data pins to digital pins on the Arduino, and the RS, EN, and RW pins as well. Include the LiquidCrystal library in your Arduino sketch.
Modify your code to display the humidity and temperature readings on the LCD. Use the `lcd.print()` function to print the values to the display. This provides a convenient way to monitor the humidity levels without relying on the Serial Monitor.
Sending Humidity Data to the Cloud or a Server
To send humidity data to the cloud or a server, you’ll need a Wi-Fi or Ethernet module for your Arduino. Popular options include the ESP8266 Wi-Fi module or the Ethernet Shield. Set up the module to connect to your Wi-Fi network or Ethernet network.
Use HTTP requests to send the humidity and temperature data to a cloud service like ThingSpeak or a custom server. Format the data in a suitable format, such as JSON. This allows you to remotely monitor and analyze the humidity data from anywhere with an internet connection.
Troubleshooting Common Issues
Common Errors and Solutions
One common issue is “Failed to read from DHT sensor!” This can be caused by incorrect wiring, a faulty sensor, or timing issues. Ensure that the sensor is properly connected to the Arduino and that the pull-up resistor is correctly placed. Adjust the delay in the loop function to allow the sensor enough time to take readings.

Another common problem is inaccurate readings. This can be due to sensor drift or environmental factors. Calibrate the sensor regularly to maintain accuracy. Shield the sensor from direct sunlight and extreme temperatures to ensure reliable measurements.
Conclusion
Summary of Key Points
Measuring humidity is essential in various applications, and Arduino, combined with the DHT22 sensor, provides a cost-effective and easy-to-use solution. Understanding the DHT22 sensor, setting up the Arduino environment, calibrating the system, and interfacing it with other devices are crucial steps in building a reliable humidity measurement system. By following the steps outlined in this post, you can create a comprehensive system for monitoring and managing humidity levels in your desired application.
FAQ
Q: What is the accuracy of the DHT22 sensor?
A: The DHT22 sensor has an accuracy of ±5% RH (relative humidity) and ±0.5°C (temperature).
Q: Can I use other types of humidity sensors with Arduino?
A: Yes, there are other types of humidity sensors that can be used with Arduino, such as the DHT11 and HIH-4030 sensors.
Q: How can I power the Arduino board and DHT22 sensor?
A: The Arduino board and DHT22 sensor can be powered using a USB cable, battery, or a wall adapter, depending on the application and requirements.
Q: Can I use the humidity measurement system for outdoor applications?
A: Yes, the humidity measurement system can be used for outdoor applications, but it requires proper protection from the elements, such as water and dust, to ensure reliable operation.
Q: How can I integrate the humidity measurement system with other sensors and devices?
A: The humidity measurement system can be integrated with other sensors and devices, such as temperature sensors, pressure sensors, and cameras, to create a comprehensive monitoring system.


